
Notice
Recent Posts
Recent Comments
Link
| 일 | 월 | 화 | 수 | 목 | 금 | 토 |
|---|---|---|---|---|---|---|
| 1 | 2 | 3 | 4 | 5 | 6 | 7 |
| 8 | 9 | 10 | 11 | 12 | 13 | 14 |
| 15 | 16 | 17 | 18 | 19 | 20 | 21 |
| 22 | 23 | 24 | 25 | 26 | 27 | 28 |
Tags
- DataBinding
- studywithme
- Popup menu background color
- Retrofit2
- json
- Room
- layout_constrainedWidth
- http
- findNavController
- Android
- 화면 회전
- BottomSheetDialogFragment
- Load failed
- Collections Function
- 기기고유값
- log
- Lifecycle
- todo
- layout_constrainedHeight
- kotlin
- gradle plugin
- SSAID
- DialogFragment
- 생명주기
- ThreeTen Backport
- Navigation
- multipart
- NumberPIcker
- RecyclerView
- WorkManager
Archives
- Today
- Total
chacha's
♻ RecyclerView에 👆 Click 이벤트 추가하기 본문
아래에서 사용된 코드는 Github 에서 확인하실 수 있습니다.
- Implement a Click Listener with RecyclerVIew and DataBinding
👆 DataBinding을 사용할 때, RecyclerView에 ClickListenr를 추가하는 방법

1. 어댑터 클래스가 있는 파일에서 clickListener 클래스를 만듭니다.
class SleepNightAdapter() : ListAdapter<SleepNight,
        SleepNightAdapter.ViewHolder>(SleepNightDiffCallback()) {
   ...
}
/**
 * click 을 감지하고 클릭과 관련되어 처리해야 데이터를 fragment 에 전달합니다.
 * click event 가 발생할 때마다 이를 fragment 에 알리는
 *   아래의 Callback method 는 ViewHolder 가 가지고 있을 것입니다.
 *
 * nightId만 있어도 Database 에서 원하는 데이터에 접근할 수 있기 때문에
 * SleepNight 객체 참조를 가지고 있을 필요는 없습니다. 따라서 sleep night id 만 파라미터로 넘겨줍니다.
 **/
class SleepNightListener(val clickListener: (sleepId: Long) -> Unit) {
    fun onClick(night: SleepNight) = clickListener(night.nightId)
}
2. xml 파일에 새로운 variable을 선언하여 clickListener 클래스와 xml을 연결합니다.
    <data>
        ...
        <variable
            name="clickListener"
            type="com.example.android.trackmysleepquality.sleeptracker.SleepNightListener" />
    </data>
3. view가 clickListener를 호출하도록 하기 위해서 layout이나 view에 onClick 속성을 추가합니다.
    <androidx.constraintlayout.widget.ConstraintLayout
        android:layout_width="match_parent"
        android:layout_height="wrap_content"
        android:onClick="@{() -> clickListener.onClick(sleep)}">
4. 어댑터 클래스의 생성자가 clickListener에 대한 참조를 전달받도록 선언합니다.
이때 어댑터는 callback을 가지고 있을 뿐, view에 대한 클릭을 어떻게 처리하는지 알 필요가 없습니다.
class SleepNightAdapter(private val clickListener:SleepNightListener) : ListAdapter<SleepNight,
        SleepNightAdapter.ViewHolder>(SleepNightDiffCallback()) {
    ...
}
5. onBindViewHolder 메서드에서 clickListener를 연결합니다.
class SleepNightAdapter(private val clickListener:SleepNightListener) : ListAdapter<SleepNight,
        SleepNightAdapter.ViewHolder>(SleepNightDiffCallback()) {
    ...
    override fun onBindViewHolder(holder: ViewHolder, position: Int) {
        holder.bind(getItem(position)!!, clickListener)
    }

    class ViewHolder private constructor(val binding: ListItemSleepNightBinding)
        : RecyclerView.ViewHolder(binding.root) {

        fun bind(item: SleepNight, clickListener: SleepNightListener) {
            binding.sleep = item
            binding.clickListener = clickListener
            binding.executePendingBindings()
        }
        ...
    }
}
6. 어댑터를 생성하는 곳으로 가서 파라미터로 clickListener callback을 정의합니다.
여기서는 현재 선택한 Item의 Id를 보여주는 Toast를 띄워줍니다.
class SleepTrackerFragment : Fragment() {
...
override fun onCreateView(inflater: LayoutInflater, container: ViewGroup?,
savedInstanceState: Bundle?): View? {
// recyclerView setting
val adapter = SleepNightAdapter(SleepNightListener { nightId ->
Toast.makeText(context, "$nightId", Toast.LENGTH_LONG).show()
})
binding.sleepList.adapter = adapter
...
}
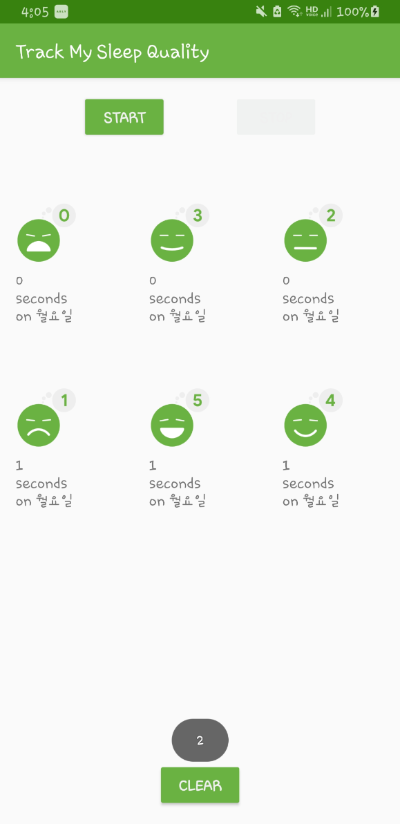
}실행 화면
'Android > My Library' 카테고리의 다른 글
| 💰 Chip 사용하기 (0) | 2021.08.06 |
|---|---|
| 🧭 Navigation을 이용해서 Dialog로 전환하기 (0) | 2021.06.09 |
| ♻ RecyclerView 에 🎩Header 추가하기 (0) | 2021.06.07 |
| ActionBar❓ ToolBar ❗ 사용하기 (0) | 2021.06.01 |
| 🎹 Bottom Navigation 사용하기 (0) | 2021.05.30 |
'Android/My Library' Related Articles
more


Comments